The best cloud hosting for tax software runs your desktop applications (Drake, Lacerte, ProSeries, UltraTax CS, CCH ProSystem fx) on a dedicated private server inside a SOC 2 Type II data center, with IRS Publication 4557 and FTC Safeguards controls built in and support staff who know tax software. This guide gives CPA and accounting firms of every size, from solo preparers to mid-size and multi-office practices, a clear framework for comparing providers on security, performance, compliance, and support.
Key Takeaways
- Verito’s VeritSpace is one specialist example, built only for tax and accounting firms, used by 1,000+ firms with 100% uptime since 2016.
- Cloud hosting moves desktop tax software off fragile office machines onto a managed private server. The applications look identical. The infrastructure underneath is stronger.
- Firm size is not the real decision driver. Workflow complexity, data sensitivity, remote work, downtime tolerance, and compliance obligations are.
- The right fit spans the whole market: solo and small firms (3 to 15 staff), mid-size firms (15 to 50 staff), and multi-office practices that want to retire aging local servers.
- Seven requirements separate a strong provider from a risky one: security and compliance, dedicated private servers, performance and uptime, tax software compatibility, responsive support, scalable and clear pricing, and WISP documentation.
- Dedicated private servers give CPA firms the best mix of isolation, predictable performance, and compliance control.
What’s the most reliable way to host desktop tax software in the cloud?
The most reliable setup is a dedicated private server built for tax workloads. Your firm’s Drake, Lacerte, ProSeries, or UltraTax install runs on hardware no other tenant touches, so performance holds during peak season. Staff log in from anywhere over an encrypted connection. Verito has delivered 100% uptime on this model since 2016.
Reliability is an architecture question before it is a vendor question. On shared infrastructure, your firm’s software competes with other tenants for the same CPU, RAM, and disk. The provider’s uptime can look fine on paper while your logins crawl, because the slowdown comes from a neighbor’s workload, not an outage.
A dedicated private server removes that variable. The machine is sized for your apps and your user count, nobody else runs on it, and performance in the first week of April looks like performance in July. Firms running QuickBooks alongside a tax suite can put the whole stack on one dedicated server.
The deciding evidence is measured history, not the brochure. Ask any provider for the published SLA and the record behind it, then see what a 100% uptime track record looks like in practice.
How do you keep hosted tax software responsive during tax season?
Dedicated resources come first: your firm runs on its own server, so no other tenant starves your apps of memory or CPU when filing peaks. And if a Windows app ever hangs, Verito AppManager lets anyone on your team close the stuck session in seconds from a desktop icon, no support ticket. Verito has held 100% uptime since 2016.
Shared platforms pool memory and CPU across every tenant. When one firm runs a heavy batch in March, the rest feel it: input lag, slow saves, the occasional lock-up. A dedicated server removes the shared pool, so your apps stay quick on the worst days of the year.
Freezes still happen on any Windows setup, so the question is what you do about one. With AppManager, you don’t open a ticket and wait. You click the icon, pick the stuck app (Drake, QuickBooks, ProSeries, TaxDome, and others), and close the session yourself in seconds.
“The platform’s performance is impressive, as it works better with faster responsiveness, which makes my work faster, more reliable, and less frustrating thanks to the absence of downtime or program freezing.”
— David C., Owner, David Cleaver-Bartholomew, EA · G2, Oct 2025
Table of Contents Show
What Cloud Hosting for Tax Software Really Means for CPAs
Cloud hosting for tax software shifts the work of running, securing, and maintaining your applications from local machines to a professionally managed private server. Your tax software does not change. The fragile infrastructure beneath it does.
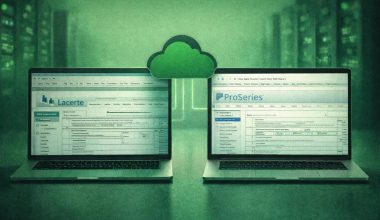
Instead of installing Drake, Lacerte, ProSeries, UltraTax CS, CCH ProSystem fx Tax, TaxWise, or TaxAct on individual workstations or a single on-premise server, everything runs on a secure remote server inside a SOC 2 Type II audited data center. Firms running several applications can put the whole stack, QuickBooks included, on one dedicated server.
The firm connects through a remote desktop or virtual desktop session. The applications look and behave the same, but the infrastructure behind them is stronger, more stable, and centralized.
Centralization also improves how firms handle data. Instead of client files scattered across workstations, shared drives, and ad hoc backups, everything lives in one controlled environment with consistent permissions, audit trails, and a single source of truth. This matters most during review cycles, when multiple preparers and reviewers move in and out of the same return. It is also where mid-size and multi-office firms feel the biggest difference, because the alternative is keeping files in sync across locations by hand.
Cloud Hosting for CPAs at a Glance
Where your software runs:
On a dedicated private server in a secure, professionally managed data center.
Where your data lives:
In centralized storage protected by encryption, strict access controls, and structured backup retention windows, typically 60 to 90 days.
Who manages updates and security:
The hosting provider handles operating system patches, tax software updates, antivirus or EDR tools, and system hardening.
Who manages backups:
Backups run automatically with point-in-time restore options, protecting the firm from accidental deletion or corruption.
What happens if your local PC fails:
Nothing stops. You log in from another computer and continue working.
What happens if your office network fails:
Staff can work from home, another office, or any secure internet connection until onsite connectivity is restored.
For firms that want predictable performance, a stronger compliance posture, and the ability to work from anywhere, this is often the most practical path forward.
Is Cloud Hosting for Tax Software Right for Your Firm’s Size?
Firm size alone is not the real decision driver. A one-person practice can carry more compliance exposure than a ten-person firm if it handles complex returns, works with high net worth clients, or stores large volumes of sensitive data. At the same time, a growing 30-person practice across two offices will hit performance and coordination limits that make on-premise systems hard to justify.
The right question is not “Are we big enough for cloud hosting?” It is “Does our current setup still support the way we work, the risks we carry, and the compliance standards we must meet?”
Breaking this down by firm profile helps clarify when the shift to the cloud becomes essential:
| Firm Type | Core Challenges | What Cloud Hosting Fixes | Ideal When… | Not Ideal When… |
|---|---|---|---|---|
| Solo preparers and 1–2 person shops | Dependence on one machine; weak backups; uneven updates; high impact if a single PC fails | Centralized storage; MFA and encrypted backups; reliable remote access; enterprise grade stability without IT overhead | You prepare meaningful return volume; want predictable costs; need stronger security and remote access | You prepare very few simple returns using basic consumer tools |
| Firms with 3–15 staff | VPN slowdowns; multi user performance issues; scattered data; bottlenecks in printing and sharing; rising compliance needs | Centralized apps and data; consistent multi user performance; standardized security; easy seasonal user additions; smooth remote work | You have multiple preparers; handle sensitive work; need reliable collaboration and stronger compliance posture | Collaboration is minimal and remote work is rare |
| Firms with 15–50 staff or multiple offices | Complex workflows; aging servers; distributed teams; need for audit trails; limited internal IT | Scalable private infrastructure; SOC 2 backed controls; seamless access across offices; clear documentation for insurance and compliance | You need predictable performance for larger teams; want to retire local servers; need strong audit trails and documentation | You already maintain secure, high availability infrastructure in house (uncommon for most firms) |
| Large and high-growth firms (50+ staff) | Multi-office coordination; heavy concurrent load; strict audit and insurance demands; provisioning at scale | Isolated private servers tuned for heavy multi-user load; fast user provisioning; documented controls for audits and carriers | You are scaling headcount or offices and need infrastructure that keeps pace | You have a mature internal data center team and prefer to host everything yourself |
The Real Determining Factors
While firm size shapes the evaluation, the decisive variables are:
| Factor | What It Means | When It Points to Cloud Hosting |
|---|---|---|
| Workflow complexity | Multiple users accessing and reviewing returns simultaneously | Local servers slow down or cannot support multi-user load |
| Data sensitivity | Payroll, business financials, high net worth clients | You need stronger controls, audit trails, and reliable backups |
| Remote work needs | Hybrid teams, multiple offices, or seasonal staff | VPNs or remote tools are slow or unreliable |
| Downtime tolerance | Impact of losing hours during filing season | Any outage disrupts billable hours and deadlines |
| Compliance requirements | IRS 4557, FTC Safeguards, WISP expectations, cyber insurance | You struggle to document controls or secure local systems |
| Onsite IT risk | Aging hardware, manual backups, ad hoc IT support | You want predictable infrastructure and fewer local points of failure |
Cloud hosting for tax software becomes the right move when your current setup can no longer guarantee performance, reliable access, and a defensible security posture. For most small and mid-sized firms, that threshold arrives sooner than they expect.
Seven Non-Negotiable Requirements for Tax Software Hosting
Choosing the best cloud hosting for tax software requires more than comparing prices or uptime claims. CPA firms handle some of the most sensitive personal and financial data of any industry. They also rely on desktop tax applications that place unusual demands on servers, review cycles, file access, and multi-user performance.
The following seven requirements form a practical checklist that firms can use to evaluate any tax software hosting provider. A strong provider should meet all seven without exceptions.
1. Security and Compliance: SOC 2, IRS, and FTC Safeguards
Security is the first requirement because every other feature depends on it.
Tax data includes Social Security numbers, banking details, income histories, and business financials.
Any hosting provider serving CPA firms must operate within a formal security framework that supports IRS Publication 4557, Publication 5293, the FTC Safeguards Rule, GLBA expectations, and cyber insurance documentation needs.
At a minimum, this means hosting in SOC 2 Type II audited data centers, enforcing multi factor authentication, encrypting data in transit and at rest, maintaining an active patching cadence, and deploying endpoint detection and response tools that monitor and contain threats. These are not optional controls. They are now baseline expectations under modern risk management and regulatory scrutiny.
Firms also need a provider that understands WISP requirements and can supply the documentation needed to support them.
Without this, you face the burden of mapping vague provider statements to regulatory expectations on your own, which becomes a liability during insurance renewals or external reviews.
| Questions to ask any provider | Red flags to Notice |
|---|---|
| Are your environments hosted in SOC 2 Type II data centers? Do you enforce multi-factor authentication for all users by default? How do you encrypt data at rest and in transit? What tools handle threat detection and response? How often are servers patched and maintained? Can you provide documentation that aligns with IRS and FTC Safeguards requirements? | No formal SOC 2 report.Claims of strong security without specific controls.Optional MFA instead of mandatory MFA. |
Tax software is resource-intensive. It also carries compliance implications that do not fit well in shared or multi-tenant environments.
In a shared hosting model, multiple customers use the same underlying resources. Their consumption patterns affect each other. Their risks can spill over into your environment. And during tax season, “noisy neighbor” effects can create unpredictable slowdowns.
Dedicated private server hosting eliminates these issues by giving each firm its own isolated environment. CPU, RAM, storage, and security boundaries belong exclusively to your firm.
Dedicated private server hosting removes these issues by giving each firm its own isolated environment. CPU, RAM, storage, and security boundaries belong exclusively to your firm.
This isolation reduces the blast radius of any security incident, keeps performance stable during peak filing weeks, and simplifies compliance documentation. For CPA firms, this is often the most practical balance between performance, predictability, and security.
Shared environments may offer lower upfront pricing, but the tradeoffs in isolation, consistency, and risk exposure become costly during busy season. Most firms that treat compliance and uptime as non-negotiable choose dedicated private servers for this reason..
| Questions to ask any provider | Red flags |
|---|---|
| Will our firm be hosted on a dedicated private server or a shared environment? How do you isolate tenants from one another? What happens if another customer consumes excessive resources? How do you prevent noisy neighbor performance issues? | The provider cannot explain their hosting model clearly.Pricing is unusually low without environmental isolation. |
3. Performance and Uptime During Tax Season
Performance is not merely a convenience. It directly affects billable hours, review cycles, and the firm’s ability to meet filing deadlines.
A single hour of downtime during March or April can derail a full day of work. Because of this, generic uptime claims like “99.9 percent” do not tell the whole story. Firms need to understand what uptime means in practice, importance of high uptime, what SLA commitments exist, and how the provider handles scaling under load.
A strong hosting platform provides consistent performance even when multiple preparers open large returns simultaneously, run calculations, print organizers, or share data with accounting applications.
It also offers a clear uptime guarantee and transparent remedies if that guarantee is missed. Latency, data center proximity, and resource allocation policies matter more during tax season than during any other period.
Scaling is another overlooked dimension. Firms often hire seasonal staff or need more compute resources for complex returns. A good provider should scale CPU and RAM quickly without disrupting existing sessions. For mid-size and multi-office firms, that elasticity is the difference between a smooth February and a stalled one.
| Mini performance checklist |
|---|
| What is the SLA uptime percentage and how is it enforced? Where are the primary and secondary data centers located? How does the provider handle maintenance during tax season? How do they scale resources during peak usage? Are performance metrics available for real-world tax workloads? |
4. Tax Software Compatibility and Optimization
Hosting tax software is not the same as hosting generic Windows applications.
Drake, Lacerte, ProSeries, UltraTax CS, TaxWise, CCH ProSystem fx Tax, and TaxAct each have unique patterns for file access, multi-user concurrency, printing, and seasonal updates.
A provider experienced with these applications anticipates their quirks, manages year-end versioning, and tunes the hosting environment accordingly.
Compatibility goes beyond installation. It includes performance tuning, ensuring smooth integrations with accounting applications, handling PDF workflows, and supporting the specialized tools firms use every day.
Providers unfamiliar with tax software often deliver environments where the applications technically run but do not perform well under real-world workloads.
| Questions to ask any provider | Red flags |
|---|---|
| Which tax applications do you host today and for how many firms? Do you support hosting Drake, Lacerte, ProSeries, UltraTax CS, or CCH ProSystem fx Tax? How do you manage tax software updates during year-end transitions? Can you host integrated accounting applications on the same server? | Provider only references generic application hosting experience. Limited knowledge of tax application update cycles. |
5. Support That Actually Solves Tax Software Problems
Most providers advertise 24/7 support. The real question is what that support covers and how quickly you reach a human who understands tax and accounting software.
Slow ticket queues, multi-layered phone trees, or support staff unfamiliar with Drake or Lacerte cause real delays when the firm needs help most.
Strong support models emphasize direct access to technicians who can solve issues spanning hosting, printers, scanners, drives, and the tax software itself.
Fast first-touch response matters, particularly during filing season when delays compound quickly. A reliable hosting provider should resolve most issues without back-and-forth escalation.
Support may be the most underrated selection criterion. Firms that spend March and April waiting for callbacks usually do so because they underestimated the importance of support quality during the buying process.
| Questions to ask any provider | Red flags |
|---|---|
| Who answers support calls: general help desk staff or specialists familiar with tax applications? What is the average response time during peak season? Does support handle printer mapping and application troubleshooting? Is live support available, or only ticket-based queues? | Slow or vague responses during pre-sales testing. Support limited to server issues but not application-level problems. |
6. Scalability and Transparent Per-User Pricing
Most CPA firms scale their workforce during busy season. Hosting must scale with them. This includes quick user provisioning, seamless addition or removal of seasonal staff, and the ability to adjust compute resources without disrupting the firm.
Pricing clarity also plays a major role in long-term satisfaction. Simple per-user pricing with clearly defined add-ons prevents billing surprises. Firms should avoid models that charge extra for after-hours support, basic security features, or standard maintenance tasks.
Month-to-month agreements or short commitments are often better suited to small and mid-sized firms than long-term contracts. A provider that cannot explain its pricing model within a few minutes tends to create administrative friction later.
| Questions to ask any provider | Red flags |
|---|---|
| How are users billed and how quickly can new users be added?Are there separate fees for migrations, support, or resource scaling?Are contracts annual, multi-year, or month-to-month?How do you handle temporary staffing increases? | Complex fee structures with many hidden surcharges.Mandatory long-term commitments for small teams. |
7. Compliance Documentation and WISP Support
Compliance is now a continuous responsibility. CPA firms are expected to maintain Written Information Security Plans, document vendor controls, and provide evidence of how they protect client data. Cyber insurance renewals also require detailed answers about infrastructure, backups, access controls, and monitoring. Firms cannot meet these requirements without support from their hosting provider.
A strong provider helps firms understand how hosting controls map to IRS and FTC expectations. This includes documentation for access control, encryption, backup retention, incident handling, and administrative policies. Providers that offer WISP support or templates significantly reduce the administrative burden on firms and eliminate guesswork during audits or insurance reviews.
This is not legal or compliance advice. It is infrastructure support that allows the firm to complete its compliance obligations with clear, defensible information.
| Questions to ask any provider | Red flags |
|---|---|
| Do you provide documentation that supports our WISP requirements? Can you map your controls to IRS Publication 4557 and FTC Safeguards Rule expectations? Do you offer templates or structured guidance for security documentation? What information can we provide to insurance carriers during renewals? | Provider cannot supply documentation beyond a marketing brochure.Lack of clarity on how hosting controls align with regulatory expectations. |
Can your team work remotely on hosted tax software?
Yes. Hosted tax software runs in a remote desktop session, so the full desktop version works from any Mac, PC, or tablet with an internet connection. Seasonal preparers get accounts in minutes, not new hardware. Access stays controlled through MFA and per-user permissions, which keeps remote work inside your WISP.
The mechanics matter for compliance as much as convenience. In a remote desktop session, the application and the data stay on the server; the laptop only displays the screen. A lost or stolen device holds no client files, which is exactly the posture a WISP describes.
Seasonal staffing gets easier the same way. A new preparer gets a login and permissions in minutes, works the season from any machine they already own, and the account is disabled the day they wrap. No hardware purchase, and no client data scattered across personal computers.
“As a long-time Drake user, I didn’t want to migrate to a new cloud tax program, and this hosting lets me keep the workflow I know while working remotely seamlessly.”
— Zhenzhong L., Owner, Apex Tax Consulting Inc · G2, Oct 2025
Dedicated Private Servers vs Other Cloud Hosting Models
Not all cloud environments are built for the demands of CPA firms. Tax software hosting sits at the intersection of performance, security, compliance, and specialized application behavior. Understanding the differences between hosting models is essential before comparing providers.
The table below is a brief rundown on the differences between Local Servers, Generic Public Cloud Virtual Machines, Shared Remote Desktop Platforms, and Dedicated Private Servers:
| Hosting Model | Peak Season Performance | Security and Compliance Fit | Ease of Management | Cost Predictability |
|---|---|---|---|---|
| Local office servers | Weak during multi-user load; hardware bottlenecks | Limited; relies on firm’s own controls and patching | High effort; on-site issues and maintenance | Moderate upfront, unpredictable long-term |
| Generic public cloud VMs (self-managed) | Strong if configured well; inconsistent if under-provisioned | Firm must implement all controls; high risk of misconfiguration | Complex; requires skilled IT management | Variable; depends on consumption |
| Shared remote desktop platforms | Inconsistent due to shared resources | Varies; multi-tenant isolation may be unclear | Easy to start; limited control | Predictable monthly pricing, but performance tradeoffs |
| Dedicated private servers optimized for tax and accounting | Consistent, stable, scalable during peak season | Strong alignment with IRS, FTC, and SOC 2 expectations | Provider-managed; minimal firm-side burden | Clear per-user pricing with predictable additions |
This comparison is a reminder why many firms evaluating the best cloud hosting for tax software eventually choose a dedicated private server model. It offers stability, compliance-readiness, and predictable performance in ways other models struggle to match.
How to Compare Tax Software Hosting Providers: A Step-by-Step Buyer’s Framework
Selecting the best tax software hosting provider requires more structure than many firms initially expect. Most providers sound similar on paper, and almost all promise security, uptime, and support.
The real differences emerge only when firms apply a systematic evaluation process. The framework below helps CPA firms compare providers consistently and justify the final decision to partners, operations managers, or compliance reviewers.
Step 1: Clarify Your Firm’s Requirements
Before comparing providers, define exactly what you need the hosting environment to support. Consider:
- Firm size and user count, including seasonal preparers and growth over the next two years
- Primary tax applications such as Drake, Lacerte, ProSeries, UltraTax CS, CCH ProSystem fx Tax, TaxWise, or TaxAct
- Supporting accounting applications hosted on the same server
- Remote work expectations across offices, homes, or field locations
- Compliance obligations under IRS Publication 4557, FTC Safeguards Rule, GLBA, and cyber insurance
- Workflow bottlenecks in your current environment, including printing, scanning, or multi-user load
A hosting provider should fit your operating model, not the other way around. Firms that skip this step often compare pricing without understanding whether the underlying platform can support the real workload.
Step 2: Shortlist Three to Five Specialist Providers
General-purpose cloud hosts can run Windows applications, but that does not make them suitable for tax workloads. CPA firms benefit from platforms built specifically for tax and accounting because:
- The provider already understands tax software behavior
- Support teams can troubleshoot application-level issues
- Compliance frameworks are aligned with what regulators expect
- Environments are structured for predictable performance in busy season
Verito’s VeritSpace platform is an example of a specialist approach, but the principle stands regardless of vendor. Limit your shortlist to providers that can demonstrate a track record with tax and accounting firms.
Step 3: Evaluate Each Provider Using the Seven Non-negotiable Requirements
Use the checklist from Section 4 as a structured filter:
- Security and compliance posture
- Private vs shared infrastructure
- Performance and uptime guarantees
- Tax software compatibility and tuning
- Support scope and responsiveness
- Scalability and pricing clarity
- Documentation and WISP support
Have each provider explain their position on each requirement in writing. Vague claims often become clear when firms request specific examples, controls, or processes.
Step 4: Score Providers on a Simple 1 to 5 Scale
A basic scoring matrix keeps the decision grounded in facts rather than impressions. For each requirement, assign:
- 1 = unacceptable
- 3 = adequate
- 5 = strong match
This creates a numerical profile you can present internally. Weight categories can be added if needed.
For example, firms with strict cyber insurance requirements may prioritize compliance documentation more heavily than pricing.
Step 5: Request a Live Demo of Your Tax Applications Running in the Cloud
A demo is the most revealing part of the evaluation. The hosting provider should show:
- How your tax software behaves under normal and peak usage
- How quickly applications open and respond
- How printing, scanning, and PDF workflows operate
- How user provisioning, MFA, and access control will work for your staff
- How backups and restore processes are executed
This is also the moment to test latency over your typical connection. If a demo feels sluggish, tax season will feel worse.
Step 6: Test Support Before You Commit
Support claims are easy to make and hard to verify without testing. Before signing:
- Call or chat during off-hours
- Ask a basic troubleshooting question
- Observe time to reach a real human
- Pay attention to whether they understand the tax applications you rely on
Many firms discover during tax season that their provider’s support model cannot meet urgent needs. Testing this early prevents that mistake.
If You Want to See a Dedicated Private Server Built for Tax Work in Action
If you want to evaluate how dedicated private server hosting behaves with real tax workloads, you can request a hands-on VeritSpace demo and apply the same buyer framework to it.
The demo should be treated like any other evaluation step: run a few returns, print documents, test responsiveness, and explore how the environment handles multi-user access.
How VeritSpace Can Enhance Your Accounting Firm’s Efficiency
This guide is designed to be vendor neutral, but many firms ask how a dedicated private server platform like VeritSpace aligns with the requirements outlined earlier.
VeritSpace is Verito’s dedicated private server platform for tax and accounting firms. Each firm receives an isolated environment in SOC 2 audited data centers, supported by 24/7 expert staff and infrastructure aligned with IRS and FTC security expectations.
You can explore a broader overview of the platform on the VeritSpace dedicated private server platform page.
The table below explains what VeritSpace offers across the seven key cloud hosting software evaluation parameters:
| Area | What VeritSpace Provides | Why It Matters for CPA Firms |
|---|---|---|
| Security and Compliance | SOC 2 Type II infrastructure; MFA by default; encryption at rest and in transit; endpoint monitoring; structured patching; VeritShield WISP documentation support | Meets IRS 4557, Publication 5293, and FTC Safeguards expectations; reduces admin burden; supplies defensible evidence for audits and cyber insurance reviews |
| Dedicated Private Infrastructure | Each firm receives its own isolated private server; no shared hosting layer; predictable resource allocation | Eliminates noisy neighbor slowdowns; reduces exposure to other tenants; supports consistent performance during heavy multi user tax workflows |
| Performance and Uptime | Tuned for large returns and concurrent use; scalable CPU and RAM for peak season; 100 percent uptime guarantee; maintenance scheduled outside tax season | Removes bottlenecks common in office servers; ensures stable workloads during filing season; supports high volume printing, scanning, and PDF workflows |
| Application Coverage and Optimization | Supports Drake, Lacerte, ProSeries, UltraTax CS, CCH ProSystem fx Tax, TaxAct, TaxWise, and accounting apps; optimized for workflow tools | Daily exposure allows support teams to anticipate update cycles, performance tuning needs, and application quirks that general cloud hosts rarely understand |
| Support Model | 24/7 phone and chat support; sub five minute average response; tax knowledgeable technicians | Enables immediate troubleshooting across hosting, applications, printers, and PDF tasks; prevents workflow disruptions during filing season |
| Migration and Onboarding | Fast migrations usually completed within ~48 hours; data transfer, user setup, shared folder and printer configuration included | Ensures a smooth transition with no downtime; removes the need to coordinate multiple vendors or manage technical steps |
| Pricing and Evaluation Resources | Simple per-user pricing from $69/user; month-to-month flexibility; no hidden support tiers | Predictable billing even with seasonal staff; easier budget planning; clear resources for evaluating cost and operational impact |
FAQ
1. What is the best cloud hosting for tax software for small CPA firms?
The best cloud hosting for tax software is one that provides dedicated private servers, SOC 2 backed security, strong IRS and FTC alignment, predictable performance in tax season, and support teams familiar with Drake, Lacerte, ProSeries, and UltraTax CS. Firms of every size, from solo preparers to mid-size and multi-office practices, often choose specialist platforms like VeritSpace because they are built for tax and accounting workloads rather than general business hosting.
2. How much does tax software hosting typically cost per user?
Most tax software hosting uses simple per-user monthly pricing, commonly starting around $69 per user per month. The total depends on storage needs, the mix of applications, dedicated server fees, and seasonal scaling. Providers with transparent, clearly itemized pricing tend to be more predictable for firms planning a budget around busy season.
3. Is cloud hosting for tax software secure enough for IRS and FTC requirements?
Yes, if the provider follows established security frameworks and supports IRS and FTC expectations. Look for SOC 2 Type II infrastructure, mandatory multi factor authentication, encryption, structured patching, endpoint monitoring, and clear documentation that helps you meet Written Information Security Plan requirements. Cloud hosting is often more secure than office servers when implemented by a specialist who manages these controls continuously.
4. What is the difference between tax software hosting and tax software itself?
Tax software is the application used to prepare returns. Hosting is the environment where the software runs. Instead of installing Drake, Lacerte, ProSeries, or UltraTax CS on local computers or office servers, the applications run on a secure private server in the cloud. Users log in remotely and work in the same desktop interface, but the infrastructure, security, backups, and maintenance are handled by the hosting provider.
5. Can I host multiple tax and accounting applications on the same cloud server?
Yes. Most dedicated private server platforms allow firms to host multiple tax applications plus accounting tools such as QuickBooks Desktop, document management systems, and supporting utilities. This centralizes data, simplifies user access, and reduces the operational burden of maintaining separate systems.
6. What happens if my internet goes down during tax season?
Your applications and data remain safe in the cloud. You can continue working from any alternative connection, whether that is a home network, secondary office, hotspot, or temporary location. The risk shifts from your local office network to having a reliable backup connection, which is typically easier to manage than maintaining on-premise servers.
7. Do I still control my data if I move my desktop tax software to the cloud?
Yes. Cloud hosting changes who manages the infrastructure, not who owns the data. CPA firms retain full ownership and control of their client files. A responsible provider gives firms the ability to export or retrieve data at any time and supplies backup retention schedules that protect against accidental loss or corruption.
tl;dr
- Tax software hosting moves desktop applications like Drake, Lacerte, ProSeries, UltraTax CS, CCH ProSystem fx Tax, TaxWise, and TaxAct from office machines to a secure private cloud environment.
- Firms move to hosting to remove workstation failures, centralize data, support remote work, and meet IRS Publication 4557, Publication 5293, and FTC Safeguards Rule expectations.
- Cloud hosting fits solo practitioners, small firms, mid-size firms, and multi-office practices once performance, uptime, and compliance demands exceed what local servers can support.
- The seven non-negotiable requirements are security and compliance posture, dedicated private servers, performance and uptime guarantees, tax software compatibility, responsive support, scalability and pricing clarity, and WISP-aligned documentation.
- Dedicated private servers provide the most balanced mix of isolation, performance, predictable resource availability, and compliance control for CPA firms of every size.
- Use a structured evaluation: define requirements, shortlist specialist providers, apply the seven-point checklist, score each provider, test real tax workflows, and test support responsiveness.
- VeritSpace shows how a specialist platform aligns with these requirements through SOC 2 infrastructure, private server isolation, 100% uptime since 2016, tax software tuning, sub-60-second human support, and clear per-user pricing.
Keep reading: choosing the right cloud
Research.com review of Verito. An independent look at the platform.
Verito vs. Azure for accounting firms. Dedicated private cloud versus public cloud, for a firm workload.
Thomson Reuters Virtual Office CS alternatives. Seven secure options if you are moving off VO CS.